First of all, Chicken Parmesan is a classic dish that combines crispy breaded chicken, rich marinara sauce, and melted cheese. Moreover, one of the keys to its success lies in the breading. Specifically, properly adhering the breading to the chicken ensures a crispy exterior that holds up well under the sauce and cheese. However, achieving perfect breading can be tricky if you’re unfamiliar with the process. Therefore, in this guide, we’ll explore step by step how to get breading to stick to chicken Parmesan.
Introduction to Breading Chicken Parmesan
First of all, getting breading to stick to Chicken Parmesan creates its iconic crispy, golden crust. Moreover, a well-breaded chicken cutlet adds texture and flavor, while providing a sturdy base for marinara sauce and melted cheese. However, although breading may seem simple, it requires specific techniques to ensure the coating stays firmly on the chicken during cooking.
Why Proper Breading Matters
Breading isn’t just about aesthetics; it serves several important purposes in Chicken Parmesan:
- Texture: The crispy coating creates a satisfying crunch that contrasts beautifully with the tender chicken and soft cheese.
- Flavor: Breadcrumbs seasoned with herbs and Parmesan cheese add depth to the dish.
- Protection: The breading acts as a barrier, helping to seal in moisture and keep the chicken juicy while preventing it from overcooking.
Without proper breading, Chicken Parmesan can lose its signature crunch and become soggy under the sauce.
Common Issues with Breading Not Sticking
Many home cooks struggle with breading that falls off during frying or baking. Some of the most common problems include:
- Improper Preparation: Skipping steps like patting the chicken dry or pounding it to an even thickness can lead to uneven breading.
- Rushed Process: Failing to let each layer adhere properly can result in the coating sliding off.
- Inadequate Binding: Not using enough egg wash or flour can cause gaps in the breading.
- Overcrowding the Pan: When frying, crowding the pan can create steam, which loosens the breading.
Understanding these pitfalls is the first step to mastering perfect breading.
check out https://eassyrecipes.com/category/dinner/
Step-by-Step Guide to Proper Breading

Achieving flawless breading for Chicken Parmesan requires attention to detail and a step-by-step approach.
Preparing the Chicken Correctly
- Pat the Chicken Dry:
- First of all, use paper towels to pat the chicken breasts dry. As a result, this removes excess moisture, therefore allowing the breading to stick better.
- Pound to an Even Thickness:
- First, place the chicken breasts between two sheets of plastic wrap. Then, use a meat mallet to pound them to an even thickness, about ½ inch. As a result, the chicken will cook evenly, while also preventing parts of the breading from burning.
- Season the Chicken:
- Lightly season the chicken with salt and pepper before breading. This enhances the flavor of the chicken itself, creating a well-seasoned final dish.
Setting Up the Breading Station
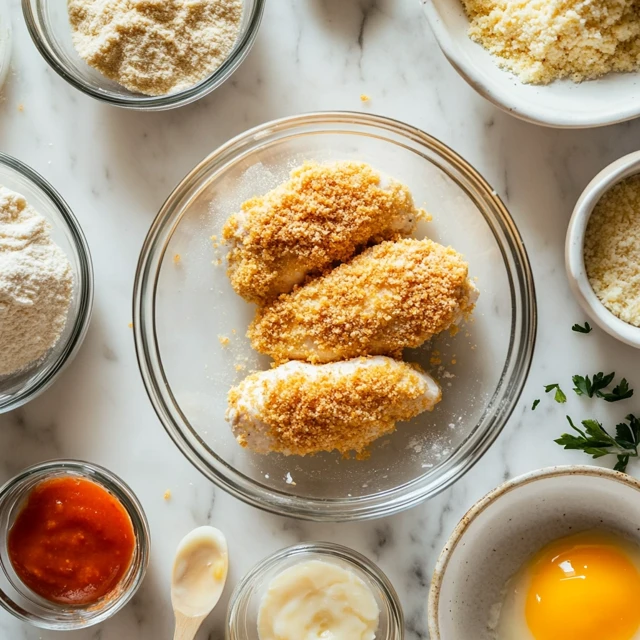
A proper breading station is essential for success. Arrange your ingredients in the following order:
- Flour:
- First, use all-purpose flour to create a dry base. As a result, this step helps the egg wash stick properly to the chicken.
- Egg Wash:
- First, whisk together eggs with a splash of milk or water. As a result, this egg wash works like glue that helps the breadcrumbs stick to the chicken.
- Breadcrumb Mixture:
- First, use a combination of seasoned breadcrumbs and grated Parmesan cheese for flavor and texture. Additionally, if you want extra crispiness, then you can add panko breadcrumbs as well.
Pro Tip:
First of all, use separate hands for wet and dry ingredients. Specifically, use one hand to handle the chicken in flour and breadcrumbs, while using the other for the egg wash. As a result, this prevents clumping and therefore keeps your breading station clean.
Applying the Breading Layer by Layer
- First Coat: Flour:
- Dredge the chicken in the flour, making sure to coat it evenly. Shake off any excess flour to avoid a thick, gummy coating.
- Second Coat: Egg Wash:
- Dip the floured chicken into the egg wash, ensuring it is fully coated. Lift the chicken and let any excess egg drip off before moving to the breadcrumbs.
- Third Coat: Breadcrumbs:
- First, press the chicken firmly into the breadcrumb mixture, making sure to coat both sides evenly. Then, use your hands to gently press the breadcrumbs onto the chicken. As a result, this will ensure they stick well.
- Rest the Breaded Chicken:
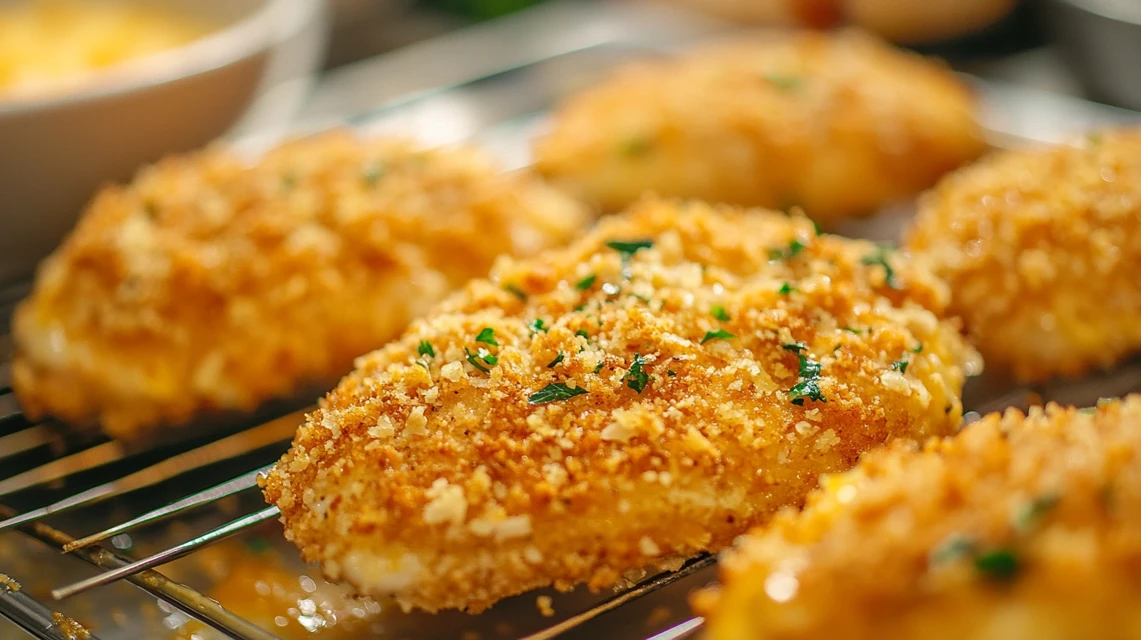
- Place the breaded chicken on a wire rack and let it rest for 10-15 minutes. This allows the coating to set and reduces the chances of it falling off during cooking.
Cooking the Chicken
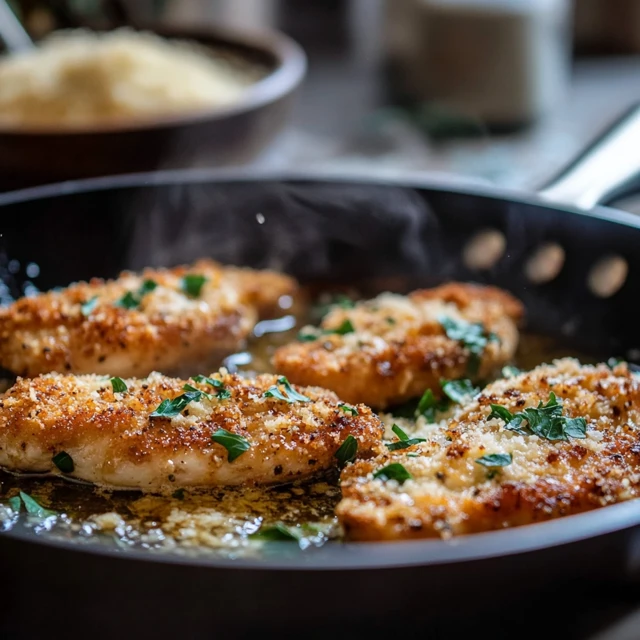
- Frying: Heat oil in a skillet over medium heat and cook the breaded chicken for 3-4 minutes per side until golden brown. Avoid overcrowding the pan to ensure even cooking.
- Baking: Preheat the oven to 400°F (200°C). Place the breaded chicken on a greased baking sheet and bake for 20-25 minutes, flipping halfway through.
Whether frying or baking, avoid moving the chicken too much during cooking, as this can loosen the breading.
check out this https://eassyrecipes.com/category/dinner/
Tips and Tricks for Perfect Breading

Getting breading to stick to chicken Parmesan needs the right ingredients, proper technique, and attention to detail. You’ll need to master these key steps to create a crispy coating that stays on. Here are essential tips for perfect breaded chicken every time.
Using the Right Ingredients
The quality of your ingredients can significantly impact the final result. Here’s how to choose and prepare the best ingredients for perfect breading:
- Flour:
- Use all-purpose flour for the first layer. Its fine texture provides an even base for the egg wash to stick.
- Season the flour with a pinch of salt, pepper, and optional spices (like garlic powder or paprika) to enhance the flavor of the breading.
- Egg Wash:
- To get breading to stick to chicken Parmesan properly, start with fresh eggs whisked with a splash of milk or water. This creates a smooth egg wash that acts as the perfect glue between the chicken and breadcrumbs.
- For extra adhesion, add a tablespoon of Dijon mustard to the egg wash for flavor and additional stickiness.
- Breadcrumbs:
- Panko Breadcrumbs: First, for an extra-crispy texture, try using panko breadcrumbs. As a result, they create a light, crunchy coating. Furthermore, this coating pairs perfectly with the creamy marinara and melted cheese in Chicken Parmesan.
- Seasoned Breadcrumbs: First, mix traditional breadcrumbs with Italian herbs and Parmesan cheese for flavor. However, if using unseasoned breadcrumbs, then add dried basil, oregano, and finally, a dash of garlic powder.
- Chicken:
- Opt for boneless, skinless chicken breasts or thighs. Thinner cuts cook faster and evenly, reducing the risk of undercooked or overcooked chicken.
- Oil for Frying:
- Use a neutral oil with a high smoke point, such as vegetable oil, canola oil, or avocado oil, to achieve a golden-brown crust without burning.
Avoiding Common Mistakes
Proper technique is just as important as using the right ingredients. Avoid these common pitfalls to ensure your breading sticks perfectly:
- Skipping the Pat-Dry Step:
- Excess moisture on the chicken prevents the breading from sticking. Always pat the chicken dry with paper towels before dredging in flour.
- Rushing the Process:
- Each layer (flour, egg wash, breadcrumbs) needs time to adhere properly. Take your time and ensure the chicken is fully coated before moving to the next layer.
- Skipping Resting Time:
- After breading, let the chicken rest on a wire rack for 10-15 minutes. This step allows the coating to set, reducing the risk of it falling off during cooking.
- Overcrowding the Pan:
- First of all, when frying, overcrowding the pan lowers the temperature. As a result, this creates steam, which then makes the breading come loose. Therefore, cook the chicken in batches to keep the heat steady.
- Using Low-Quality Parmesan:
- Pre-grated Parmesan can be too dry and powdery, resulting in a bland coating. Always use freshly grated Parmesan cheese for better texture and flavor.
- Not Adjusting Oil Temperature:
- If the oil is too hot, the breading will burn before the chicken is cooked through. If too cold, the breading will absorb excess oil and become soggy. Use medium heat and monitor the temperature carefully.
- Skipping Seasoning:
- Season each layer—flour, egg wash, and breadcrumbs—for a fully flavored coating. Bland breading can leave the final dish tasting flat.
Frequently Asked Questions
How do you keep breading from falling off chicken parmesan?
Keeping the breading intact while cooking chicken Parmesan requires following these essential tips:
- Pat the Chicken Dry:
Excess moisture on the chicken prevents the breading from adhering properly. Use paper towels to pat the chicken dry before starting the breading process. - Layer Properly:
Always follow the three-layer breading technique: dredge the chicken in flour first, coat it with egg wash, and then press it into breadcrumbs. Each layer helps the next adhere securely. - Rest Before Cooking:
After breading the chicken, allow it to rest on a wire rack for 10-15 minutes. This helps the breading set and reduces the chance of it falling off during frying or baking. - Handle Gently:
Avoid moving the chicken too much during cooking. Use tongs to carefully flip the chicken once during frying or baking. - Avoid Overcrowding:
When frying, overcrowding the pan can create steam, which loosens the breading. Cook in batches to maintain consistent heat and ensure crisp breading.
What is the best way to get bread crumbs to stick to chicken?
To get breadcrumbs to stick to chicken effectively, follow this proven process:
- Start with Dry Chicken:
Moisture is the enemy of good breading. Pat the chicken dry with paper towels to ensure a clean, dry surface. - Dredge in Flour:
Coat the chicken evenly in all-purpose flour. This layer creates a dry base that allows the egg wash to adhere properly. - Use an Egg Wash:
Whisk together eggs and a splash of milk or water to create a smooth, sticky wash. The egg proteins act as glue, binding the breadcrumbs to the chicken. - Press Breadcrumbs Firmly:
After coating the chicken in breadcrumbs, press them gently but firmly onto the surface. This helps the crumbs stick securely. - Rest Before Cooking:
Allow the breaded chicken to sit for a few minutes before cooking. This step solidifies the coating, ensuring it doesn’t fall off during frying or baking.
Why is my breading not sticking to my chicken?
There are several reasons why breading may fail to stick to chicken. Here’s how to troubleshoot common issues:
- Skipping the Flour Step:
Without the flour base, the egg wash won’t adhere properly, and the breadcrumbs will slide off. - Excess Moisture:
Wet chicken prevents the breading layers from sticking. Always pat the chicken dry before starting the breading process. - Improper Egg Wash:
If the egg wash is too thin or unevenly applied, it won’t hold the breadcrumbs. Ensure the chicken is fully coated in egg wash before moving to the breadcrumbs. - Not Pressing Breadcrumbs:
Simply rolling the chicken in breadcrumbs isn’t enough. Press the crumbs firmly onto the chicken to create a secure coating. - Overcrowding During Cooking:
Cooking too many pieces at once can create steam, which loosens the breading. Fry or bake the chicken in smaller batches for best results.
How do you keep batter from falling off?
Batter, like breading, can easily fall off if not applied and cooked correctly. Here are tips to keep batter securely in place:
- Use Dry Chicken:
Just like breading, batter sticks best to dry chicken. Pat the chicken thoroughly before dipping it into the batter. - Thick Batter Consistency:
Batter that’s too thin won’t cling well to the chicken. Ensure your batter is thick enough to coat the chicken evenly without dripping excessively. - Preheat the Oil:
Batter adheres best when it hits hot oil immediately. Ensure your oil is preheated to the correct temperature (around 350°F or 175°C) before frying. - Cook in Small Batches:
Overcrowding the pan can lower the oil temperature and cause the batter to fall off. Fry only a few pieces at a time to maintain consistent heat. - Avoid Touching the Chicken Too Much:
Once in the oil, let the chicken cook undisturbed for the first few minutes. Flipping or moving it too soon can cause the batter to loosen and fall off.
Conclusion: Perfecting Chicken Parmesan Breading
Getting breading to stick to Chicken Parmesan properly takes special skill. First, this technique needs mastering to make restaurant-quality perfection. Moreover, success comes from preparing the chicken right and carefully adding each breading layer. Then, you must let it rest before cooking. Additionally, using fresh ingredients is essential for good results. Finally, your attention to detail will create a golden-brown coating that stays crispy whether you fry or bake it.
Key Takeaways for Perfect Breading:
- Always pat the chicken dry to remove moisture.
- Follow the three-layer method: flour, egg wash, and breadcrumbs.
- Use high-quality breadcrumbs and freshly grated Parmesan for the best flavor and texture.
- Allow the breaded chicken to rest before cooking to set the coating.
- Cook in small batches and avoid overcrowding the pan to maintain consistent heat.
Getting breading to stick to Chicken Parmesan starts with its iconic crispy crust. First, a well-breaded chicken cutlet adds texture and flavor. Then, it creates a sturdy base for sauce and cheese. However, while breading seems simple, it needs special steps to stay on during cooking.

