How To Do A Heart-Shaped Cake? First and foremost, heart-shaped cakes are the ultimate way to express love and care through a delicious dessert. Moreover, whether it’s for Valentine’s Day, an anniversary, or a heartfelt birthday celebration, these charming cakes bring joy to any occasion. Furthermore, their unique shape naturally symbolizes affection, consequently making them a thoughtful and creative choice for those you cherish.
Creating a heart-shaped cake may seem challenging at first glance. However, with the right guidance, ingredients, and tools, it’s easier than you might think. In this guide, we’ll walk you through every step, ensuring your cake not only looks amazing but also tastes incredible. Let’s get started with everything you need to know before you dive into baking.
Preparing to Make a Heart-Shaped Cake

First and foremost, preparation is key when it comes to baking a heart-shaped cake. In order to make sure the process is smooth and enjoyable, it’s essential to begin by gathering all your ingredients and tools. Subsequently, you’ll need to select the best flavor, and finally, follow some tried-and-true baking tips for optimal results.
Ingredients and Tools You’ll Need
First and foremost, having the right ingredients and tools ensures your cake turns out just as you imagined. Here’s what you’ll need:
Ingredients:
- Flour: 2 ½ cups of all-purpose flour for the cake base.
- Sugar: 1 ½ cups of granulated sugar for sweetness.
- Butter: 1 cup of unsalted butter, softened for easy mixing.
- Eggs: 3 large eggs to bind the batter.
- Milk: 1 cup of whole milk for a moist texture.
- Baking Powder: 1 ½ teaspoons to help the cake rise.
- Vanilla Extract: 1 teaspoon for flavor.
- Food Coloring (Optional): Red or pink for a romantic touch.
Tools:
- Heart-Shaped Cake Pan: The easiest way to achieve the perfect shape.
- Round and Square Cake Pans: For a DIY heart shape if you don’t have a specialized pan.
- Mixing Bowls: To combine your ingredients with ease.
- Electric Mixer: For a smooth and lump-free batter.
- Cooling Rack: To let the cake cool evenly before decorating.
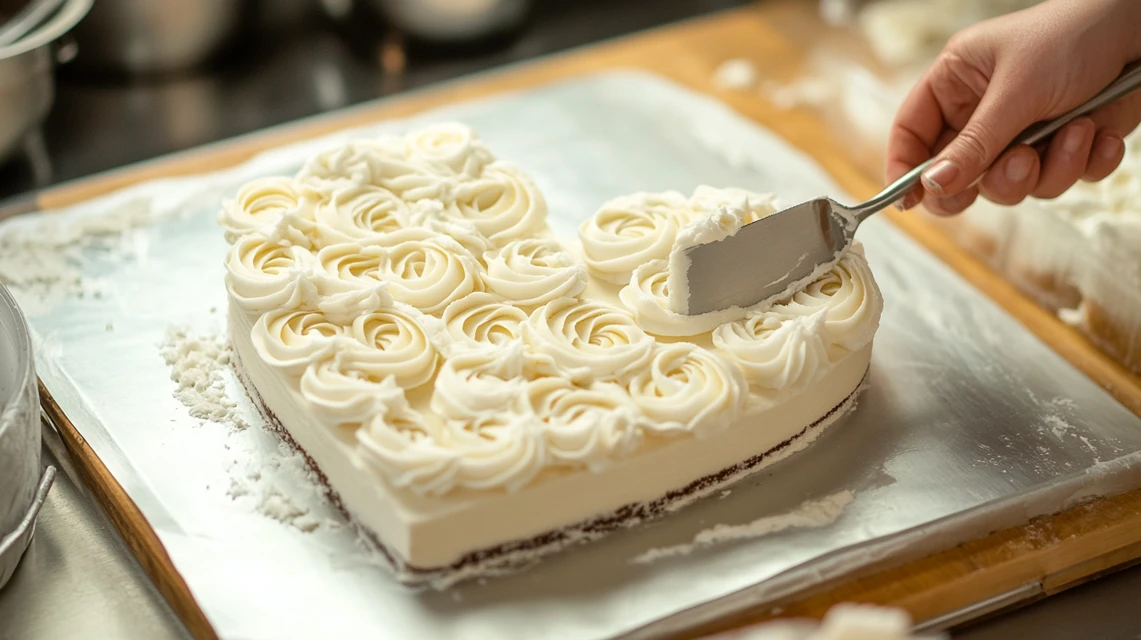
- Offset Spatula: For spreading frosting seamlessly.
- Piping Bags and Tips: For adding decorative touches.
By gathering these essentials beforehand, you’ll save time and enjoy a stress-free baking experience.
Choosing the Right Cake Flavor
Once you’ve prepared your tools and ingredients, it’s time to decide on the flavor of your cake. This step is crucial because the flavor sets the tone for the entire dessert. Here are some popular options:
- Classic Vanilla: A crowd-pleaser that pairs well with almost any frosting.
- Rich Chocolate: Perfect for indulgent celebrations, especially romantic ones.
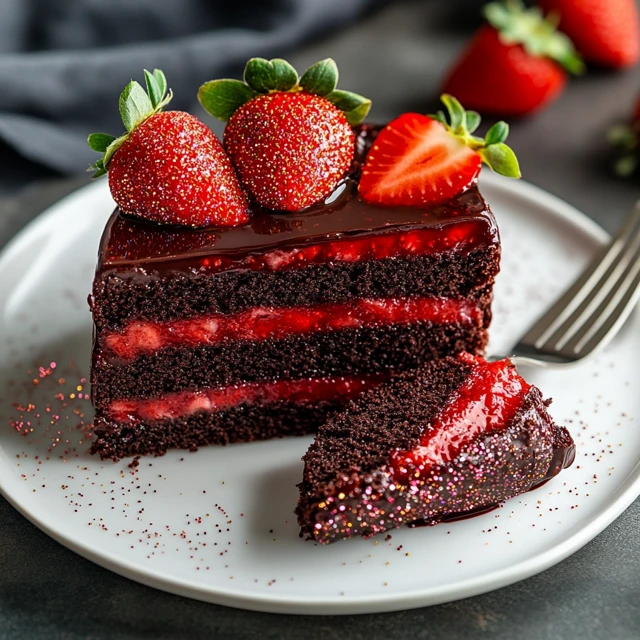
- Strawberry or Red Velvet: Vibrant options that complement the heart shape beautifully.
- Lemon or Orange: For a refreshing and zesty twist.
Consider the preferences of your guests or the recipient of the cake. Additionally, think about how the flavor complements the occasion. For example, red velvet is ideal for Valentine’s Day, while chocolate is great for anniversaries.
Baking Tips for a Perfect Cake
Baking the perfect heart-shaped cake requires a little attention to detail. These tips will help you achieve flawless results:
- Prepare the Pan: Grease the heart-shaped pan (or round and square pans) thoroughly with butter or cooking spray. Dust with flour to prevent sticking.
- Measure Ingredients Accurately: Baking is a science, so be precise with your measurements. Use measuring cups and spoons for consistency.
- Mix Gently: Avoid overmixing the batter to prevent a dense cake. Mix just until the ingredients are combined.
- Preheat the Oven: Always preheat your oven to the specified temperature. For most cakes, this will be 350°F (175°C).
- Test for Doneness: Insert a toothpick into the center of the cake. If it comes out clean, the cake is ready.
- Cool Completely: Allow the cake to cool in the pan for 10 minutes, then transfer it to a cooling rack. This step is critical before frosting to avoid melting the icing.
By following these baking tips, your heart-shaped cake will be both visually stunning and deliciously moist.
check out this https://eassyrecipes.com/category/desserts/
Methods to Create a Heart-Shaped Cake
Using a Heart-Shaped Pan
First and foremost, a heart-shaped pan is undoubtedly the easiest way to create a perfect heart cake. Specifically, it eliminates the need for carving or adjusting shapes, thus ensuring a clean and symmetrical result. Consequently, here’s how to use it effectively:
- Prepare the Pan: Grease the pan thoroughly with butter or cooking spray and dust it with flour. This prevents sticking and makes it easier to remove the cake once baked.
- Pour the Batter Evenly: Carefully pour your cake batter into the pan, ensuring it spreads evenly to avoid uneven layers.
- Bake and Cool: Place the pan in a preheated oven and bake according to the recipe. Once done, allow the cake to cool in the pan for 10–15 minutes before gently turning it out onto a cooling rack.
Initially, using a heart-shaped pan is the most straightforward method, making it particularly ideal for beginners or those short on time. As a result, the pan itself naturally creates the iconic shape, therefore leaving you free to focus entirely on decorating.
DIY Heart Shape Without a Special Pan
If you don’t have a heart-shaped pan, don’t worry! You can still create a beautiful heart cake using a round and a square pan. This method is surprisingly simple and adds a touch of creativity to your baking process.
Step-by-Step Instructions:
- Bake the Cakes: Prepare one round cake and one square cake using the same batter. Let them cool completely.
- Cut and Arrange:
- Cut the round cake in half to form two semi-circles.
- Place the square cake so it looks like a diamond.
- Attach the semi-circles to the top two edges of the diamond to form a heart shape.
- Secure the Shape: Use a layer of frosting or whipped cream to hold the pieces together.
In particular, this alternative method allows you to create a heart cake without purchasing a special pan, therefore proving that, ultimately, a little ingenuity goes a long way in baking.
Customizing the Size of Your Heart Cake
Heart cakes can be tailored to suit different occasions by adjusting their size. Whether you’re baking for a small gathering or a large celebration, customization ensures your cake is just right.
- Mini Heart Cakes: Perfect for individual servings or party favors. Use small heart-shaped pans or carve mini hearts from a larger cake.
- Standard Size: Ideal for family celebrations, this size works well with a traditional heart-shaped pan or the DIY method.
- Large Heart Cakes: Great for weddings or big events. Use multiple layers or stack cakes to create a towering centerpiece.
Customizing the size allows you to match the cake to the scale of the event, ensuring it’s both practical and impressive.
check out this https://eassyrecipes.com/category/desserts/
Decorating a Heart-Shaped Cake

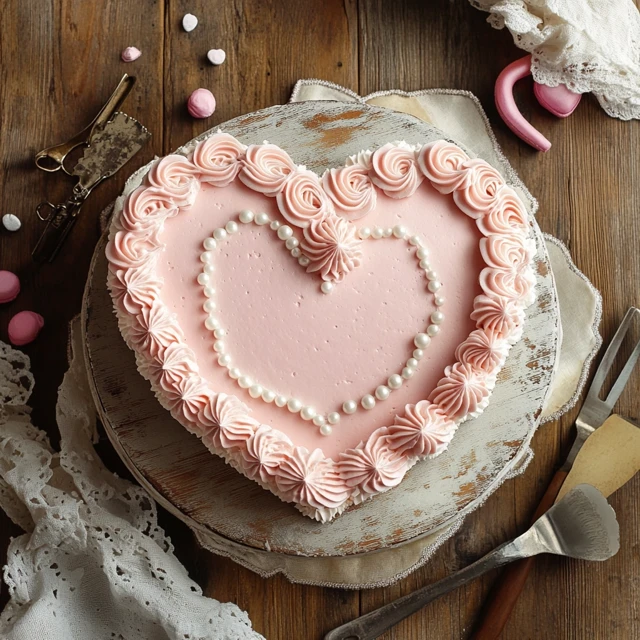
Once your heart cake is baked and shaped, decorating it is where the real fun begins. With endless possibilities, you can personalize your cake to suit any theme or occasion.
Simple and Elegant Designs
For those who prefer minimalism, a simple design can be just as stunning as an elaborate one. Here’s how to achieve it:
- Smooth Frosting: Use buttercream or ganache to cover the cake evenly, creating a clean and polished look.
- Piped Borders: Add a delicate border around the edges with a piping bag and star tip.
- Sprinkles or Pearls: Lightly dust the cake with edible pearls or sprinkles for a touch of elegance.
This approach is perfect for romantic occasions like anniversaries or Valentine’s Day.
Adding Colors and Edible Decorations
Colorful decorations can make your heart cake even more eye-catching. Consider these ideas:
- Bold Colors: Use red, pink, or pastel-colored frosting for a vibrant and festive look.
- Edible Flowers: Decorate with fresh or edible flowers for a charming, natural aesthetic.
- Fondant Accents: Cut out shapes like hearts or roses from fondant to add dimension to your design.
Colors and edible decorations allow you to align the cake with the event’s theme, making it truly unique.
Writing Messages on a Heart Cake
Adding a personalized message to your heart cake is a heartfelt way to make it special. Here’s how to do it:
- Choose Your Message: Keep it short and sweet, such as “I Love You,” “Happy Anniversary,” or “Be Mine.”
- Use a Piping Bag: Fill a piping bag with a contrasting frosting color and use a fine tip for precision.
- Practice First: Practice writing on parchment paper before applying it to the cake.
A well-written message adds a personal touch, turning your cake into both a dessert and a meaningful gesture.
check out this https://eassyrecipes.com/category/desserts/
Methods to Create a Heart-Shaped Cake
Using a Heart-Shaped Pan
Above all, a heart-shaped pan is undoubtedly the easiest way to create a perfect heart cake. As a result, it eliminates the need for carving or adjusting shapes, thus ensuring a clean and symmetrical result. Consequently, here’s how to use it effectively:
- Prepare the Pan: Grease the pan thoroughly with butter or cooking spray and dust it with flour. This prevents sticking and makes it easier to remove the cake once baked.
- Pour the Batter Evenly: Carefully pour your cake batter into the pan, ensuring it spreads evenly to avoid uneven layers.
- Bake and Cool: Place the pan in a preheated oven and bake according to the recipe. Once done, allow the cake to cool in the pan for 10–15 minutes before gently turning it out onto a cooling rack.
Using a heart-shaped pan is the most straightforward method, making it ideal for beginners or those short on time. The pan itself creates the iconic shape, leaving you free to focus on decorating.
DIY Heart Shape Without a Special Pan
If you don’t have a heart-shaped pan, don’t worry! You can still create a beautiful heart cake using a round and a square pan. This method is surprisingly simple and adds a touch of creativity to your baking process.
Step-by-Step Instructions:
- Bake the Cakes: Prepare one round cake and one square cake using the same batter. Let them cool completely.
- Cut and Arrange:
- Cut the round cake in half to form two semi-circles.
- Place the square cake so it looks like a diamond.
- Attach the semi-circles to the top two edges of the diamond to form a heart shape.
- Secure the Shape: Use a layer of frosting or whipped cream to hold the pieces together.
This method allows you to create a heart cake without purchasing a special pan, proving that a little ingenuity goes a long way.
Customizing the Size of Your Heart Cake
Heart cakes can be tailored to suit different occasions by adjusting their size. Whether you’re baking for a small gathering or a large celebration, customization ensures your cake is just right.
- Mini Heart Cakes: Perfect for individual servings or party favors. Use small heart-shaped pans or carve mini hearts from a larger cake.
- Standard Size: Ideal for family celebrations, this size works well with a traditional heart-shaped pan or the DIY method.
- Large Heart Cakes: Great for weddings or big events. Use multiple layers or stack cakes to create a towering centerpiece.
Customizing the size allows you to match the cake to the scale of the event, ensuring it’s both practical and impressive.
Decorating a Heart-Shaped Cake
Once your heart cake is baked and shaped, decorating it is where the real fun begins. With endless possibilities, you can personalize your cake to suit any theme or occasion.
Simple and Elegant Designs
For those who prefer minimalism, a simple design can be just as stunning as an elaborate one. Here’s how to achieve it:
- Smooth Frosting: Use buttercream or ganache to cover the cake evenly, creating a clean and polished look.
- Piped Borders: Add a delicate border around the edges with a piping bag and star tip.
- Sprinkles or Pearls: Lightly dust the cake with edible pearls or sprinkles for a touch of elegance.
This approach is perfect for romantic occasions like anniversaries or Valentine’s Day.
Adding Colors and Edible Decorations
Colorful decorations can make your heart cake even more eye-catching. Consider these ideas:
- Bold Colors: Use red, pink, or pastel-colored frosting for a vibrant and festive look.
- Edible Flowers: Decorate with fresh or edible flowers for a charming, natural aesthetic.
- Fondant Accents: Cut out shapes like hearts or roses from fondant to add dimension to your design.
Colors and edible decorations allow you to align the cake with the event’s theme, making it truly unique.
Writing Messages on a Heart Cake
Adding a personalized message to your heart cake is a heartfelt way to make it special. Here’s how to do it:
- Choose Your Message: Keep it short and sweet, such as “I Love You,” “Happy Anniversary,” or “Be Mine.”
- Use a Piping Bag: Fill a piping bag with a contrasting frosting color and use a fine tip for precision.
- Practice First: Practice writing on parchment paper before applying it to the cake.
A well-written message adds a personal touch, turning your cake into both a dessert and a meaningful gesture.
FAQs About Making a Heart-Shaped Cake
How to Shape a Cake Like a Heart?
Shaping a cake like a heart is easier than you might think. If you don’t have a heart-shaped pan, you can use a combination of a square and a round cake pan to create the iconic shape.
Steps to Shape a Cake Like a Heart:
- Bake Your Cakes: Prepare one round cake and one square cake using the same batter. Ensure both are baked evenly and allowed to cool completely.
- Cut the Round Cake: Slice the round cake in half to create two semi-circles.
- Arrange the Pieces: Place the square cake so it looks like a diamond. Attach the two semi-circles to the top edges of the diamond to form a heart.
- Secure with Frosting: Use frosting or whipped cream to hold the pieces together and cover any visible seams.
This method is both simple and creative, allowing you to achieve a heart shape without special tools.
How to Make a Heart-Shaped Cake Without a Circle Pan?
If you don’t have a circle pan, you can still make a heart-shaped cake with some clever adjustments using a square pan alone. Here’s how:
- Bake in a Square Pan: Bake your cake batter in a square pan and let it cool completely.
- Trim the Edges: Use a sharp knife to cut the top two corners of the square diagonally to form the top curves of the heart.
- Shape the Bottom: Trim the bottom edge to create the pointed tip of the heart.
- Frost and Decorate: Smooth frosting over the entire cake to hide the cuts and add decorations to complete the design.
This technique is ideal when you have limited tools but still want to create a beautifully shaped heart cake.
How Much Batter Do I Need for a Heart-Shaped Pan?
The amount of batter you need depends on the size of your heart-shaped pan. Typically, a heart-shaped pan holds the same volume as a standard round or square pan of similar dimensions. Here’s a general guide:
- 6-Inch Heart Pan: Requires about 2 cups of batter.
- 8-Inch Heart Pan: Requires about 4 cups of batter.
- 10-Inch Heart Pan: Requires about 6 cups of batter.
Tips for Adjusting Batter:
- Avoid Overfilling: Fill the pan no more than two-thirds full to prevent overflow while baking.
- Check the Recipe: Most cake recipes indicate the amount of batter they produce, making it easier to plan.
- Make Extra Batter: If you’re unsure, prepare slightly more batter than needed. Leftovers can be used for cupcakes or a mini cake.
Measuring the right amount of batter ensures your cake bakes evenly and retains its heart shape.
How to Cut a Heart-Shaped Cake Equally?
Cutting a heart-shaped cake equally can be tricky because of its unique shape, but with a few tips, you can achieve clean and even slices.
Steps for Equal Slices:
- Start with the Center: Use a knife to make a vertical cut down the middle of the heart, dividing it into two halves.
- Cut Each Half: Slice each half into equal sections, starting from the top curve and working toward the pointed tip.
- Use a Guide: Lightly score the cake with a knife or toothpick to mark the sections before cutting.
- Use a Sharp Knife: A sharp, serrated knife helps create clean cuts without crumbling the cake.
For larger gatherings, you can cut smaller slices by dividing each section further. This method ensures everyone gets a piece with an even distribution of frosting and filling.
Conclusion
Making a heart-shaped cake is a rewarding experience that combines creativity, love, and delicious results. Whether you’re using a heart-shaped pan, crafting one from a square and round cake, or improvising with a single square pan, there are plenty of ways to achieve this iconic shape.
From deciding how much batter to use to cutting the cake into equal slices, the process is both fun and flexible. Decorating your cake adds a personal touch, turning it into a centerpiece for any occasion, whether it’s Valentine’s Day, an anniversary, or just a way to show someone you care.
By following these tips and answering common questions, you’re well-equipped to create a heart-shaped cake that’s not only beautiful but also perfect for sharing with loved ones. So, gather your ingredients, tools, and creativity, and enjoy the sweet satisfaction of baking a cake straight from the heart!

