Piping is a creative and elegant way to decorate cakes, adding charm and personality to any design. Whether you’re crafting a romantic heart-shaped cake or enhancing a simple round cake, piped hearts bring a touch of sophistication and a sense of thoughtfulness to your dessert. Learning how to pipe hearts is easier than it looks, especially with the right tools, techniques, and practice.
Why Piping Adds Elegance to Cakes
Piping transforms a plain cake into a masterpiece. It allows for intricate designs, personalized messages, and artistic borders that elevate the overall presentation. When it comes to hearts, piping is particularly effective in conveying themes of love, romance, and care.
Benefits of Piping Hearts:
- Customizable Designs: Hearts can be large, small, symmetrical, or whimsical, fitting any occasion.
- Visual Appeal: Piped hearts create a clean and polished look that enhances the cake’s aesthetics.
- Personal Touch: Decorating with piped designs shows effort and attention to detail, making the cake feel more meaningful.
Whether for a wedding, Valentine’s Day, or a birthday, piped hearts add elegance and emotion to your cake.
Tools Needed for Piping Hearts
To pipe hearts effectively, you’ll need the right tools. Each item plays a role in ensuring your designs are precise and visually stunning.
Essential Tools:
- Piping Bags: Choose disposable or reusable piping bags for applying frosting.
- Piping Tips: A round tip or small star tip works well for piping hearts. Experiment with different sizes for variety.
- Couplers: These allow you to switch tips easily without changing the piping bag.
- Frosting Scraper or Spatula: Use these to smooth the cake’s surface before piping.
- Turntable: A rotating cake stand helps you pipe evenly around the entire cake.
Having these tools ready ensures that your piping process is smooth and enjoyable.
check out this https://eassyrecipes.com/category/desserts/
Choosing the Right Frosting for Piping
The type of frosting you use greatly impacts the success of your piped hearts. Frosting that’s too soft will lose its shape, while frosting that’s too stiff may be difficult to pipe.
Best Frosting Options:
- Buttercream Frosting: The most versatile option for piping. It holds its shape well and can be easily colored or flavored.
- Royal Icing: Ideal for intricate designs and sharp edges, though it dries hard and isn’t as creamy as buttercream.
- Ganache: A smooth and glossy option that works best for outlines and simple designs.
Tips for Perfect Frosting Consistency:
- Add powdered sugar to thicken frosting if it’s too soft.
- Mix in a few drops of milk or cream to thin frosting if it’s too stiff.
- Test the frosting’s consistency by piping a few shapes on parchment paper before starting on the cake.
The right frosting ensures that your hearts look clean and hold their shape throughout the decorating process.
Step-by-Step Guide to Piping Hearts on a Cake

Now that you understand the tools and frosting required, let’s dive into the step-by-step process for piping beautiful hearts on your cake.
Preparing Your Piping Bag and Tips
Proper preparation sets the stage for successful piping. Here’s how to get started:
- Choose Your Tip: Attach a round or star tip to your piping bag using a coupler for flexibility.
- Fill the Bag: Spoon your prepared frosting into the piping bag, filling it no more than two-thirds full. Twist the top of the bag to prevent frosting from spilling out.
- Secure the Bag: Use a rubber band or clip to seal the bag, ensuring steady pressure while piping.
By preparing your tools thoroughly, you’ll have better control over your designs.
Practicing Heart Shapes Before Piping
How To Pipe Hearts On A Cake? Before piping directly onto your cake, practice on parchment paper or a clean surface. This step helps you get comfortable with the technique and refine your design.
Practice Tips:
- Hold the piping bag at a 45-degree angle for better control.
- Squeeze gently to create the top curve of the heart, then release pressure as you pull downward to form the point.
- Experiment with different sizes and styles to find what works best for your design.
Practicing beforehand builds confidence and ensures a polished final result.
Piping Hearts Directly on the Cake
Once you’re comfortable with the technique, it’s time to decorate your cake. Follow these steps for clean and symmetrical hearts:
- Plan Your Design: Decide where you’ll place the hearts. Use a toothpick to lightly outline their positions on the cake for guidance.
- Start Piping: Pipe the top curves of the heart first, then drag the tip downward to form the point.
- Maintain Steady Pressure: Squeeze the piping bag gently and evenly to ensure consistent shapes.
- Add Details: For extra flair, pipe smaller hearts or dots around the larger ones to create a cohesive design.
If you make a mistake, don’t panic. Gently scrape off the frosting with a spatula and try again.
check out this https://eassyrecipes.com/category/desserts/
Creative Ideas for Piping Hearts
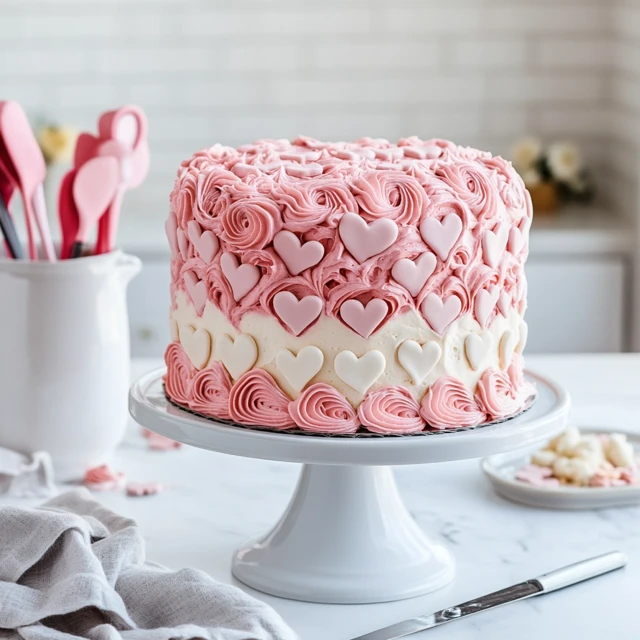
Border Designs with Hearts
One of the most versatile ways to incorporate piped hearts into your cake design is by creating a heart-themed border. This simple yet elegant idea can frame the entire cake, drawing attention to its shape and enhancing its overall aesthetic.
How to Pipe Heart Borders:
- Outline the Border: Use a toothpick to mark the area where the border will go. This ensures uniform spacing and alignment.
- Pipe the Hearts: Hold the piping bag at a 45-degree angle and gently squeeze to create small heart shapes along the edge of the cake. Start with the top curves and pull downward to form the point of each heart.
- Alternate Sizes: For added visual interest, alternate between larger and smaller hearts, or add dots between them for contrast.
Design Variations:
- Use a star tip for textured hearts that resemble rosettes.
- Pipe hearts in alternating colors to match the event theme.
- Add edible glitter or metallic accents for a touch of glamour.
Heart borders are a classic and eye-catching way to highlight the cake’s edges while maintaining a cohesive design.
Filling a Cake Top with Piped Hearts
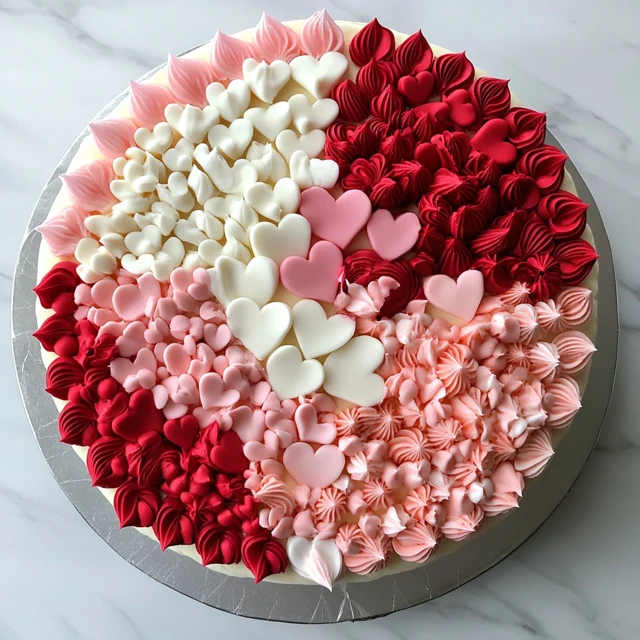
How To Pipe Hearts On A Cake? If you want your cake to make a bold statement, consider covering the top entirely with piped hearts. This design is both creative and impactful, making it ideal for occasions like Valentine’s Day, anniversaries, or weddings.
Steps to Cover the Cake Top:
- Start at the Center: Begin piping hearts at the center of the cake, working outward in concentric circles. This helps maintain symmetry and ensures the design looks balanced.
- Vary the Heart Sizes: Mix larger and smaller hearts to create depth and dimension.
- Overlap for Texture: Slightly overlap some of the hearts to give the design a layered, textured effect.
Tips for Success:
- Use contrasting frosting colors for a vibrant and dynamic look.
- Incorporate heart-shaped sprinkles or edible pearls between piped hearts for added detail.
- Practice on parchment paper first to perfect your spacing and angles.
Filling the cake top with hearts creates a striking design that showcases your piping skills while aligning perfectly with a romantic or celebratory theme.
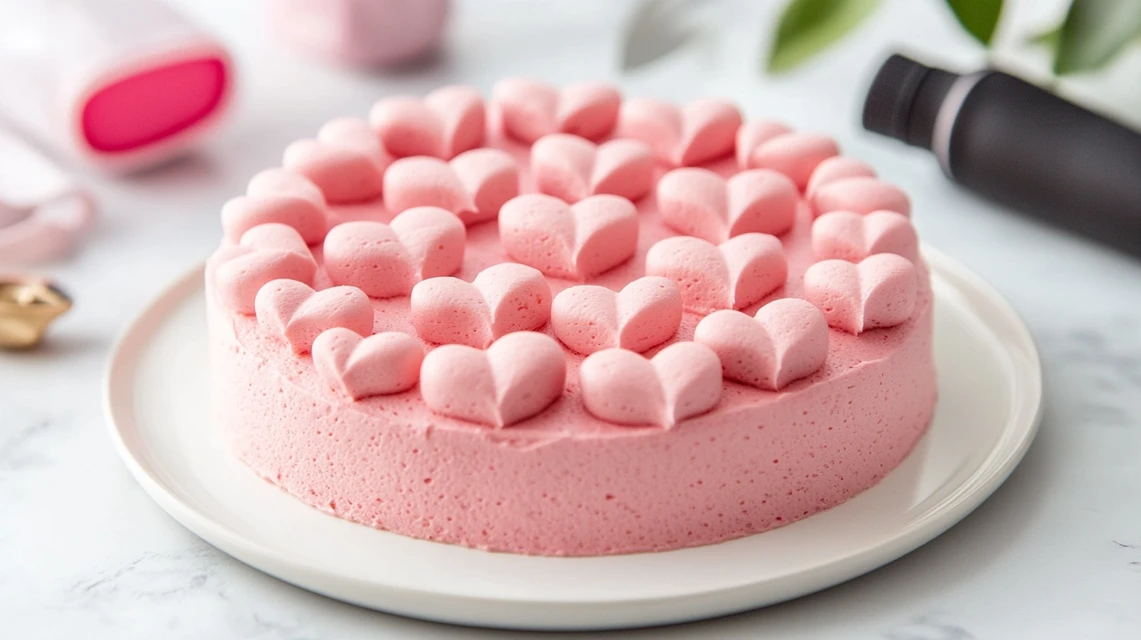
Creating 3D Heart Effects with Piping
For a more dramatic and artistic touch, you can use piping techniques to create 3D heart effects that pop off the surface of the cake. These designs add height and visual interest, making the cake look more intricate and professionally crafted.
How to Pipe 3D Hearts:
- Layer the Frosting: Start by piping a small heart base directly onto the cake.
- Build Height: Pipe additional layers of frosting on top of the base, gradually narrowing the shape to maintain the heart’s proportions.
- Smooth the Sides: Use a small spatula or the back of a spoon to smooth the frosting and define the heart’s edges.
Creative Ideas for 3D Hearts:
- Heart Bouquets: Pipe clusters of 3D hearts in different sizes to resemble a bouquet.
- Floating Hearts: Pipe hearts on small fondant bases and attach them to thin wires for a “floating” effect. Insert the wires into the cake for a whimsical design.
- Textured Hearts: Use different piping tips, such as star or petal tips, to add texture and variety to your 3D hearts.
3D heart effects make the cake feel luxurious and unique, perfect for grand celebrations or special events where the cake is the centerpiece.
check out this https://eassyrecipes.com/category/desserts/
Combining Ideas for a Stunning Design

How To Pipe Hearts On A Cake? You don’t have to choose just one of these ideas—combine them to create a truly show-stopping cake. For example, use a heart border to frame the base, fill the top with smaller piped hearts, and add 3D hearts as focal points. By mixing techniques, you can create a design that’s both cohesive and captivating.
Piping hearts is a versatile and fun way to customize your cake for any occasion. Whether you’re crafting a border, filling the top, or experimenting with 3D designs, these creative ideas ensure your cake is as beautiful as it is delicious.
FAQs About Piping Hearts on Cakes
How to Do a Heart-Shaped Cake?
How To Pipe Hearts On A Cake? Creating a heart-shaped cake is simpler than you might think. While using a heart-shaped pan is the easiest method, there are creative ways to achieve the shape without specialized tools.
With a Heart-Shaped Pan:
- Prepare your cake batter and pour it into a greased heart-shaped pan.
- Bake as directed, and once cooled, decorate as desired.
Without a Heart-Shaped Pan:
- Bake one round and one square cake of the same size.
- Cut the round cake in half to form two semi-circles.
- Position the square cake like a diamond, then place the semi-circles against the top sides to form a heart shape.
- Frost the seams to blend the pieces seamlessly.
This method ensures you can achieve the iconic heart shape even with basic baking tools.
How Do You Pipe Flowers on a Cake for Beginners?
Piping flowers is an excellent way to enhance your cake design, and beginners can start with simple techniques that look beautiful.
Steps to Pipe Basic Flowers:
- Prepare the Piping Bag: Use a petal tip for flowers like roses or tulips.
- Practice First: Before piping directly onto the cake, practice your technique on parchment paper.
- Start with a Center: Pipe a small dot or swirl for the flower’s center.
- Add Petals: Pipe petals around the center by angling the tip slightly outward and squeezing the bag gently. Rotate the cake or parchment as you go to maintain symmetry.
Tips for Beginners:
- Use buttercream frosting for smoother, more defined flowers.
- Start with simple designs like daisies or rosettes before attempting complex flowers like roses.
- Keep your hands steady and maintain even pressure for consistent results.
With practice, piping flowers becomes an enjoyable and creative way to decorate cakes.
How to Portion a Heart-Shaped Cake?
Portioning a heart-shaped cake can seem tricky due to its unique design, but with the right method, you can achieve even slices that look professional.
Steps to Portion a Heart-Shaped Cake:
- Cut Down the Center: Use a sharp knife to make a vertical cut through the middle of the heart, dividing it into two halves.
- Slice Each Half: Cut each half into evenly sized slices, starting from the curved edges and working toward the pointed tip.
- Adjust for Size: Depending on the number of servings needed, you can make smaller or larger slices.
Tips for Portioning:
- Pre-mark the cake with a toothpick to visualize the slices before cutting.
- Use a serrated knife for cleaner cuts, especially if the cake has multiple layers.
- Serve on flat plates to prevent slices from toppling.
This technique ensures that every guest gets a well-proportioned piece, whether the cake is single- or multi-layered.
How to Evenly Cut a Heart-Shaped Cake?
How To Pipe Hearts On A Cake? Cutting a heart-shaped cake evenly requires a steady hand and a strategic approach. Here’s how to achieve neat and symmetrical slices:
Step-by-Step Guide:
- Divide the Cake: Begin by cutting a vertical line through the center of the heart to create two halves.
- Mark the Slices: Lightly score each half with a knife or toothpick to mark equal portions.
- Cut Along the Marks: Slice along the pre-marked lines, working from the rounded top edges down to the pointed tip.
- Use a Turntable: If you have a cake turntable, use it to rotate the cake for better control and precision while slicing.
Additional Tips:
- For larger gatherings, cut smaller slices to stretch the cake further.
- Clean the knife after each cut to avoid smudging the frosting.
- Use a cake slicer or ruler for perfectly even portions.
Evenly cutting a heart-shaped cake ensures a professional presentation and fair servings for all guests.
Conclusion
How To Pipe Hearts On A Cake? Piping hearts on cakes is a delightful way to add elegance, charm, and personality to your dessert. Whether you’re designing a border, filling the cake top, or experimenting with 3D effects, the possibilities are endless with a bit of creativity and practice. Alongside your decorative efforts, understanding how to shape, portion, and evenly cut a heart-shaped cake ensures a stunning and delicious result that’s easy to serve.
By following the tips and techniques outlined here, you’ll master the art of piping and presenting heart-themed cakes for any occasion. From romantic gestures to festive celebrations, your cakes will not only look beautiful but also leave a lasting impression on everyone lucky enough to enjoy them.

